This wood serving board was a diamond in the rough.

I found this wood serving board at TJMax for $6 and I loved the shape, but wasn’t a fan of the engraved flowers (or the pen drawing on it). I was pretty sure that, with some elbow grease, I’d be able to sand the engraving out of the wood. So I brought it home to give it a try. It took a little more work than I was expecting, but it worked! And now I have a simple, minimal serving board, in the perfect shape without the flowers.
This would be a great project to try with thrift store finds as well, so click through if you want more details on how I sanded it down, what I tools I used, etc.

Wood Serving Board DIY
Serving boards like this one, that are thick, are usually pretty expensive. So when I saw the price, I jumped on it, sort of.
I almost didn’t make it to the checkout bc I started wavering on whether I’d be able to sand down the engraving (it was pretty deep). And I didn’t want to waste it if it didn’t work out. But then I convinced myself it was doable and headed home to give it a try.
Here are the tools I used…
That’s it! I linked directly to the exact sander I used, in case that’s helpful for you. We have several sanders and this one is the most powerful, that we have. Great for projects like this that require removing a good amount of material.
One last thing to note before you get started: You’ll also need to find a work surface to use for sanding. So keep that in mind. If you have something freestanding that you can move around outside, that would be ideal. Because unless you have an attachment for your sander then vacuums up all of the saw dust, it’s going to be a messy process.


How I removed the engraving from the wood
I set up a work surface outside (we use a Bora centipede that folds up) and clamped the wood serving board to the table as tightly as I could get it.
Then, attach the sanding disc to your sander and get to it. Depending on how deep the engraving is, you may be sanding for a while. If you’re just dealing with removing surface scratches, pen marks, etc it won’t take but a few minutes. But for a deep engraving like mine, it’s going to take more effort. I can’t remember exactly how long I actually spend sanding, but it was under 30 minutes for sure. So still not that long considering.
Note on sanding: Although the engraved design was only at the bottom of the serving board, I had to sand the entire surface. To avoid having an uneven surface in the end.
Once the sanding is complete. Wipe it down and use cutting board oil (wiped on with a rag or old t-shirt) all over the board to give it a nice seal. Let it dry (I would say at least 24 hours to be safe) and then it’s ready to use.
You can use the finished piece as a cutting board or a serving board. Just be sure to re-oil the board whenever it starts to dry out. Which would usually be just once or twice a year.

Wood Serving Boards to Buy
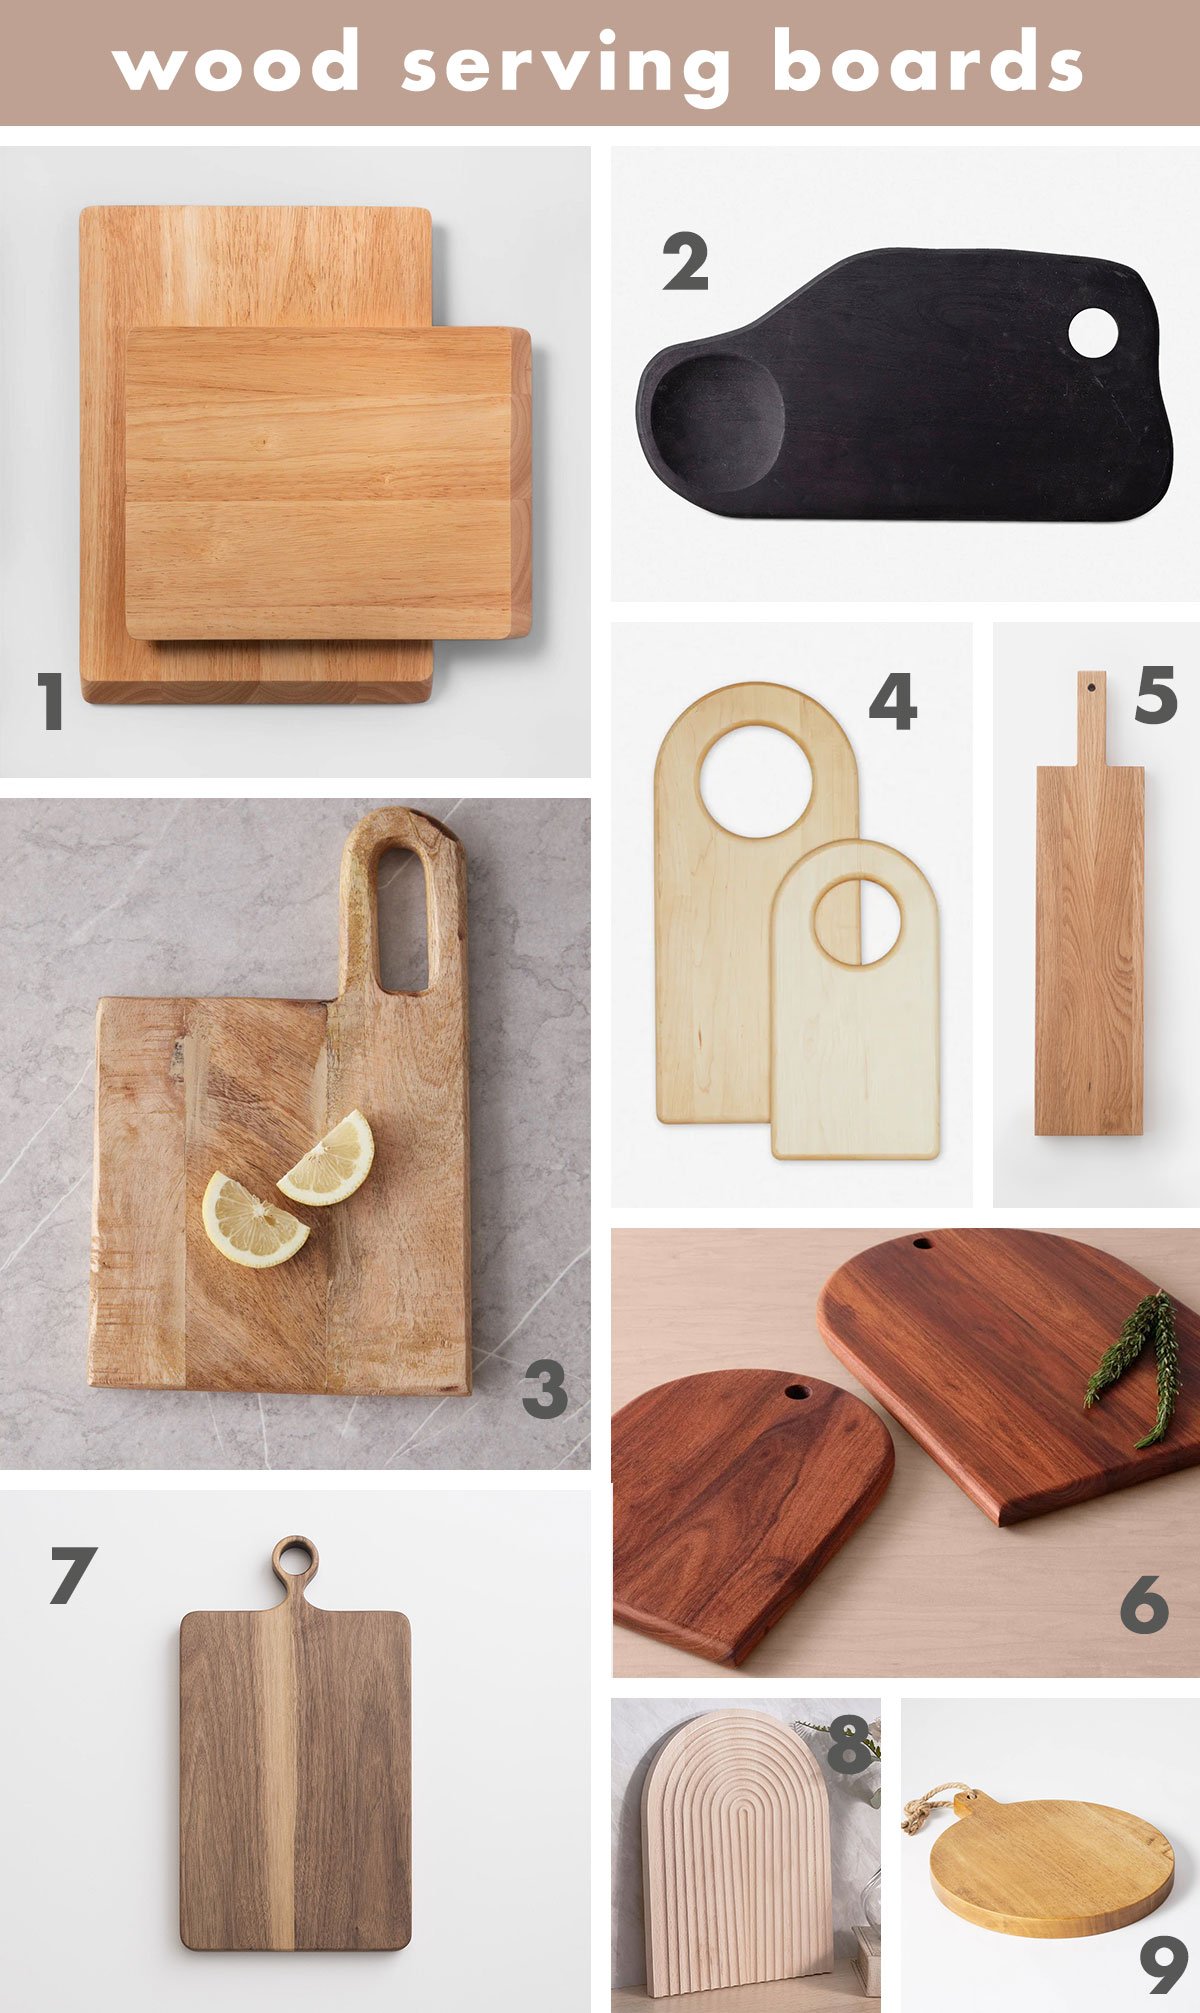
And if you’ve gotten this far and are saying to yourself, eh I don’t know if I want to put in the effort, I have you covered. Here are some beautiful wood serving boards that you won’t have to DIY bc they’re perfect as is.
1. 2 piece wood cutting board set $20 – perfect for everyday
2. rosala serving board $36
3. reyes cutting board $14 – such a good price!
4. simple wood arch cutting board $85 – these are my fave
5. oak serving board $80
6. tikal wood serving board $125 – comes in 2 colors
7. walnut cutting board $78
8. wooden arch serving board $18
9. rubber wood serving board $20


Looking for more serving board / cutting board inspiration? Check these out…


