


A DIY shoe rack is a budget-friendly solution to keep your space neat and organized. With minimal tools and a sheet of plywood, you can build a simple, customizable, and stylish storage unit that fits your hallway or closet perfectly.

Materials:
- x2 sheets of plywood
- Wood glue
- Clamps
- Stain or paint of choice
- Router
- Pine board
Step 1: Determine the Size and Plan the Design

Before cutting any wood, decide on the size of your shoe rack based on the number of shoes you need to store and the available space. Consider the height of each shelf to accommodate different types of footwear, such as boots, sneakers, or heels.
Measure the height, width, and depth of your shoes to ensure the rack will fit them properly. For example, a 45-inch wide, 30-inch tall, and 18-inch deep design works well for most setups.
Once you have the measurements, plan the number of shelves and their spacing. If you own taller shoes like boots, you may want to allocate larger compartments for them and shorter shelves for flats or sneakers.
Step 2: Create Grooves for the Shelves


Since the boards are thin (0.5 inches thick), using nails or screws may cause them to split. To avoid this, use a router to create grooves where the shelves will slide in securely. Mark the shelf locations on both side panels, adjusting the height for taller shoes if needed. Set the router depth to cut into the wood without going all the way through, then carefully carve out the grooves. Route the edges of the top and bottom panels as well to ensure a tight, sturdy connection.
Step 3: Set Shelving in Your DIY Shoe Rack

With the all of the grooves cut, it is time to set the shelving for your DIY shoe rack in place. Lay one side down on the ground, with the grooved side up. Apply a thick amount of wood glue within each groove.
Step 4: Finish the Top and Smooth the Edges


Cut the pine top to size with a 2-inch overhang on each side, then stain it with dark walnut for contrast. Once dry, check that the glue has set by gently wiggling the rack. Sand any rough plywood edges to smooth out chips and create a clean finish.
Step 5: Paint the Shoe Rack

Apply two coats of white paint, following the wood grain for a smooth finish. Leave the top unpainted for the stained pine board.
Step 6: Attach the Top

Apply a generous amount of wood glue to the top of the shoe rack for a strong bond. Place the stained pine board on top, then use scrap wood under the clamps to prevent damage. Secure tightly and let it dry overnight.

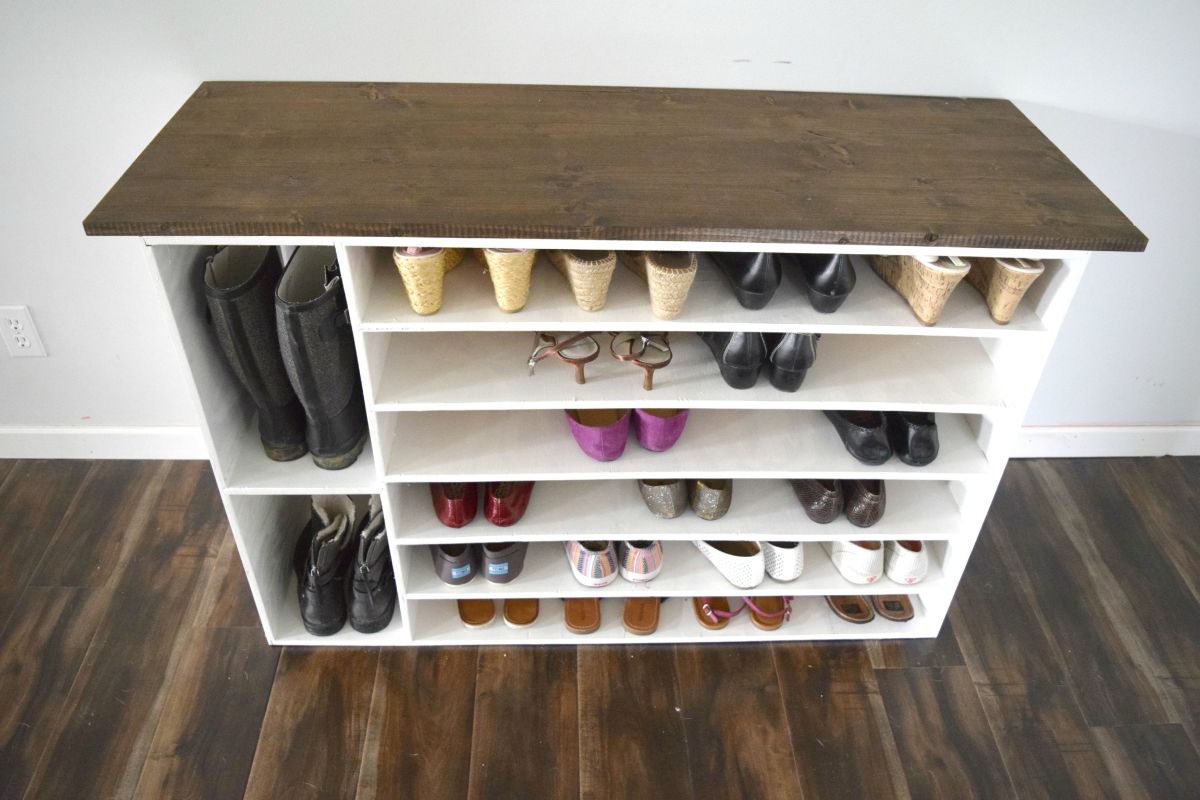
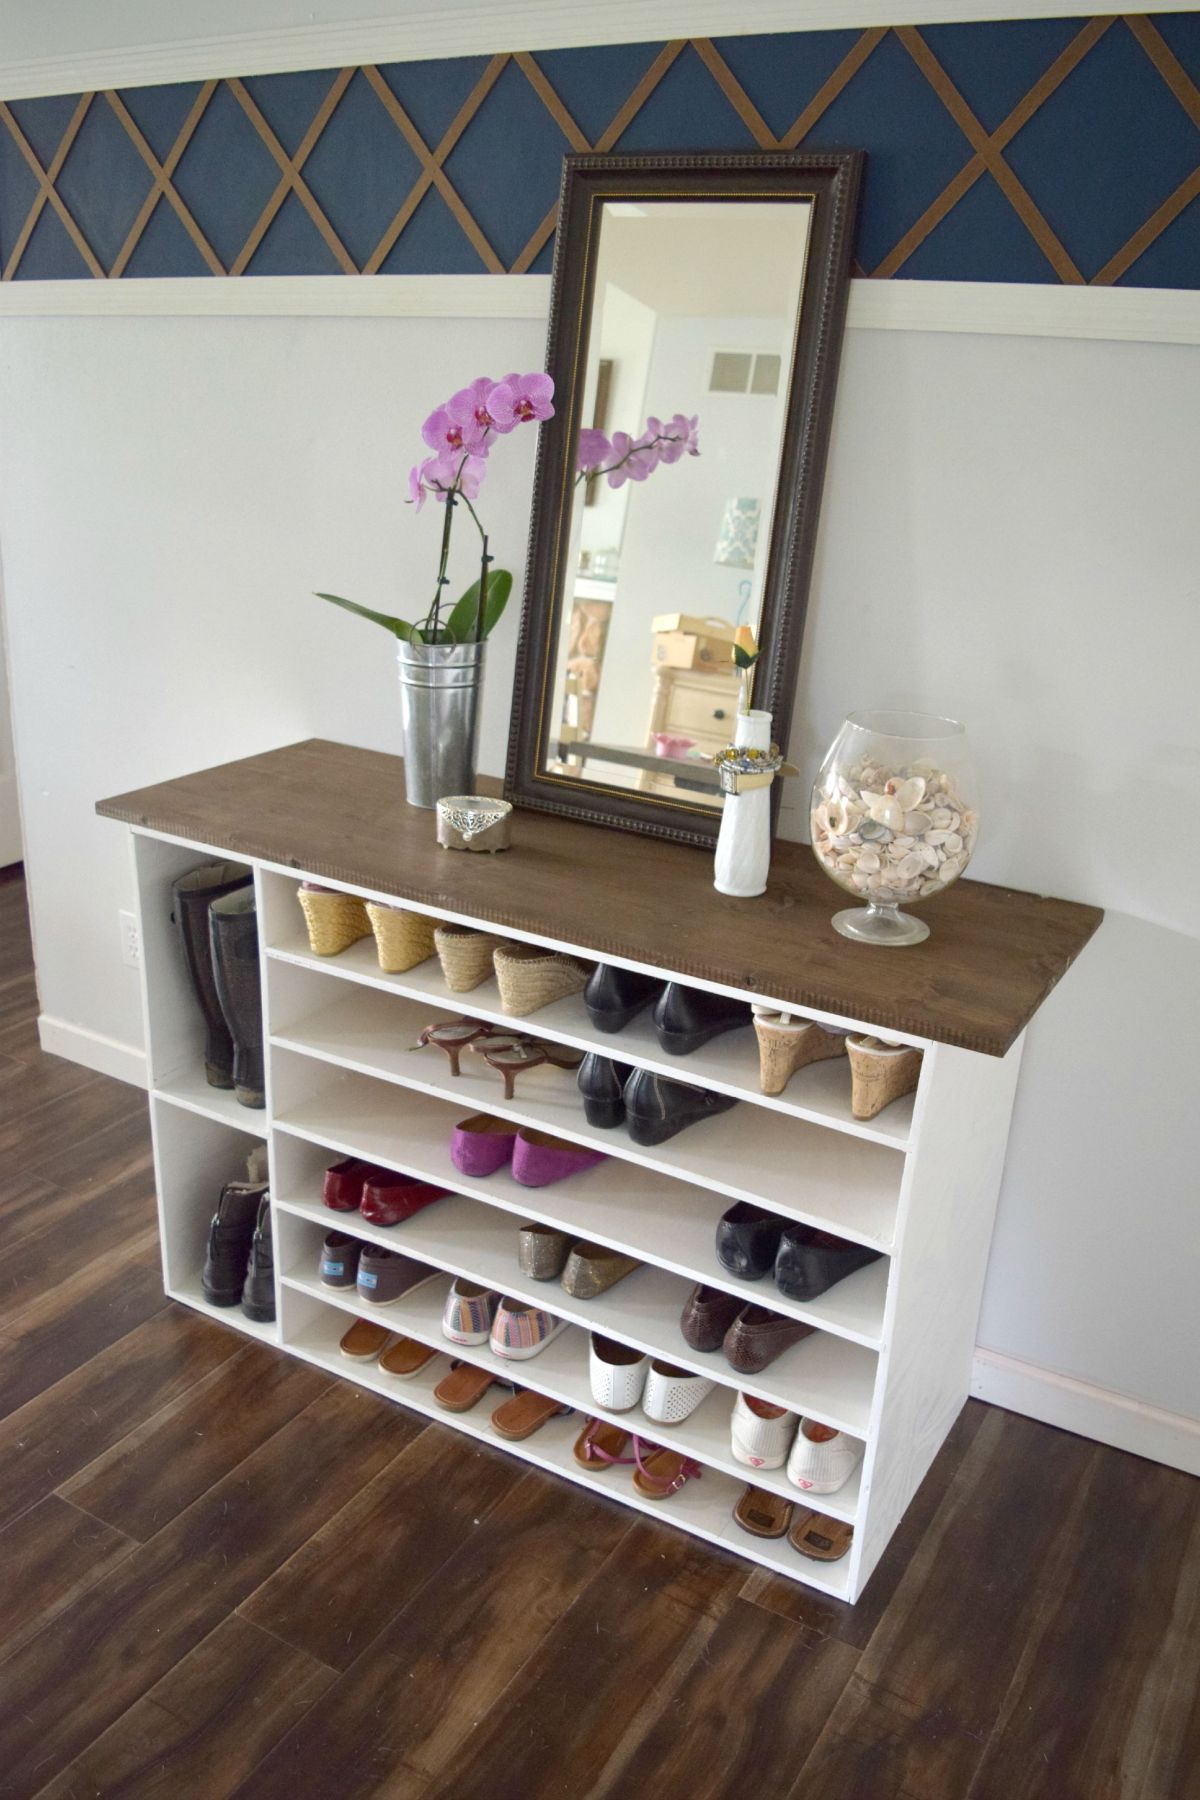
Now you know how to build a stylish sneaker rack using plywood, with the option to upgrade to natural wood for a refined look. This DIY project offers a custom storage solution to keep your shoes organized while enhancing your space.

