


A budget-friendly DIY farmhouse table is a great way to add rustic charm to your home without breaking the bank. Using materials like four wood planks, two 2x4s, three 3x3s, two 1×0.5 pieces, a plywood sheet, and basic household tools, you can build a sturdy and stylish table that enhances any dining space.

Materials:
- x4 planks
- x2 2×4
- x3 3×3
- x2 1x.5
- x1 piece of plywood
- stain
- sanding blocks
Step 1: Prep and Measure

Start by deciding on the size of your farmhouse table based on your space. I measured and settled on 4 feet wide, 5 feet long, and 32 inches high—slightly taller than my old 30-inch table but still within standard height.
Step 2: Create the Chevron Tabletop
![]()
![]()
To give my DIY farmhouse table a unique look, I designed a chevron-style top. First, I cut the plywood base to 48″ x 60″ as the foundation. Then, I selected 1″-thick pine planks with natural knots for character.
I marked the plywood’s centerline and began placing the planks at a 45-degree angle, starting from the middle and angling outward. After setting them in place, I marked where they overhung the plywood edges and trimmed them for a clean fit.
Step 3: Attach and Secure the Planks
![]()
![]()
After ensuring a snug fit, I applied wood glue to the plywood and placed the planks. To secure them, I added heavy objects for weight and let it sit overnight
Step 4: Start the Legs

While the glue set, I began working on the legs. I purchased a 3-ft galvanized pipe, 1 inch in diameter, and spray-painted it black. This pipe would go between the two legs for added support.
For the legs, I cut 4x4s to 3 feet long, ensuring they were sturdy but not too wide to interfere with seating. I also cut another 4×4 to 25 inches for the center post. When combined with the base height and table thickness, this gave a total height of 32 inches. I screwed the two 4x4s together, creating a T-shape. Then, I cut a 2×4 to 48 inches and attached it underneath the table top, forming an H-shape base.
Next, I added angled details to the legs by cutting a 2×4 at a 45-degree angle, making each piece 18 inches long. This connected the center post to the base and the table top, forming an X design.
Finally, I screwed the angled 2x4s into the H-shaped base, completing the farmhouse-style legs.
Step 5: Drill Hole

To add a unique detail, I drilled a hole slightly larger than 1 inch in the center of the X of the legs. Using a drill bit, I carefully drilled through the wood just enough to allow the galvanized pipe to slide through from one side to the other.
Step 6: Framing


To finish the edges of the tabletop, I added a frame using 1-inch wide by 1/2-inch thick pine boards. I cut them to the length of the table and made 45-degree cuts at the corners for a flush, clean look. I then nailed the frame in place around the wood planks.
Step 7: Sanding, Staining, and Sealing

After framing, I sanded the tabletop to smooth out any uneven areas using an electric sander. Once the surface was flat, I applied Minwax Classic Gray stain with a rag, wiping along the wood grain to avoid streaks. I stained the legs more thoroughly and wiped away any drips. After the stain dried, I sealed the table with clear lacquer, applying two coats with wide strokes to ensure full coverage and protection.
Step 8: Assemble

Once everything was stained and dry, I connected the tabletop to the legs. I cut small squares from 2x4s and placed them on the underside of the table to create a secure foundation. I pushed the galvanized pipe through the drilled hole and screwed the end cap to hold the pipe in place, connecting the two legs.


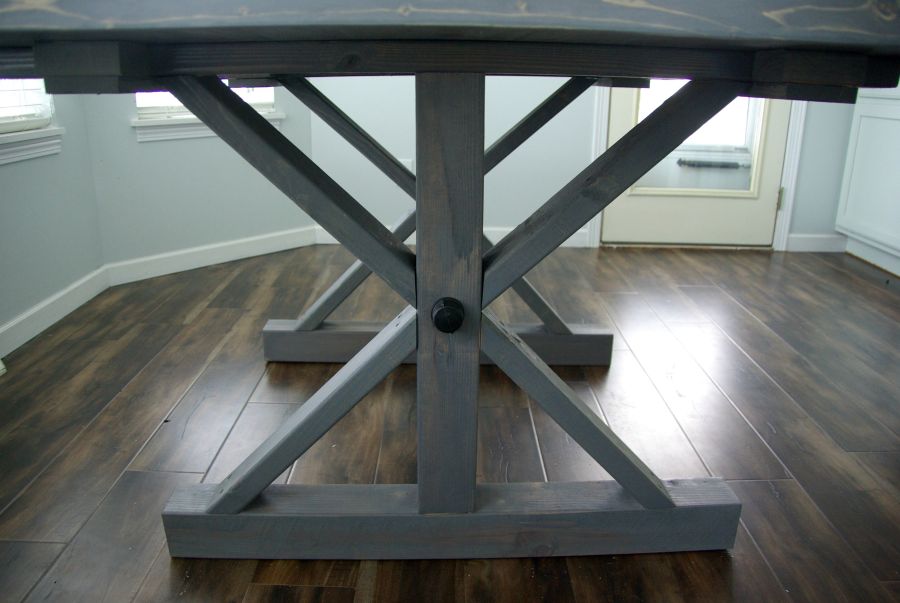


With the dark gray stain and angled wood planks, this table takes on a contemporary twist while maintaining the charm of a classic farmhouse design. The addition of galvanized pipes and the X-shaped legs brings extra detail and uniqueness, elevating the table’s overall look.

