


I have often thought of myself as “gardening against the odds.” My rural Black Earth, Wisconsin, garden is adjacent to a marsh and pond and is technically in Zone 5a, but the open farmland and subsequent winds around me place it closer to Zone 4b. I’ve lost plants to harsh winters, deer, rabbits, and woodchucks. I’ve had snapping turtles till up my garden beds to make nests and beloved woody plants destroyed by beavers. As if all that weren’t enough, the majority of the shade in the garden is from black walnut trees, which cause lots of problems, like robbing moisture and nutrients from surrounding plants.
And yet, looking at the garden’s lush landscape, you’d never imagine that it has faced this laundry list of environmental challenges. Actually, I think of the harsh environment as a metaphor for my equally strong persistence as a gardener, always realizing that gardening is a collaboration with nature in which I’m never totally in charge. As a plant lover, I’ve found this situation to be challenging—yet surprisingly exciting. I’ve experimented and discovered several design techniques that have helped me defy the odds in my landscape. If these tactics worked for me, imagine how well they might work in a location with slightly better odds.
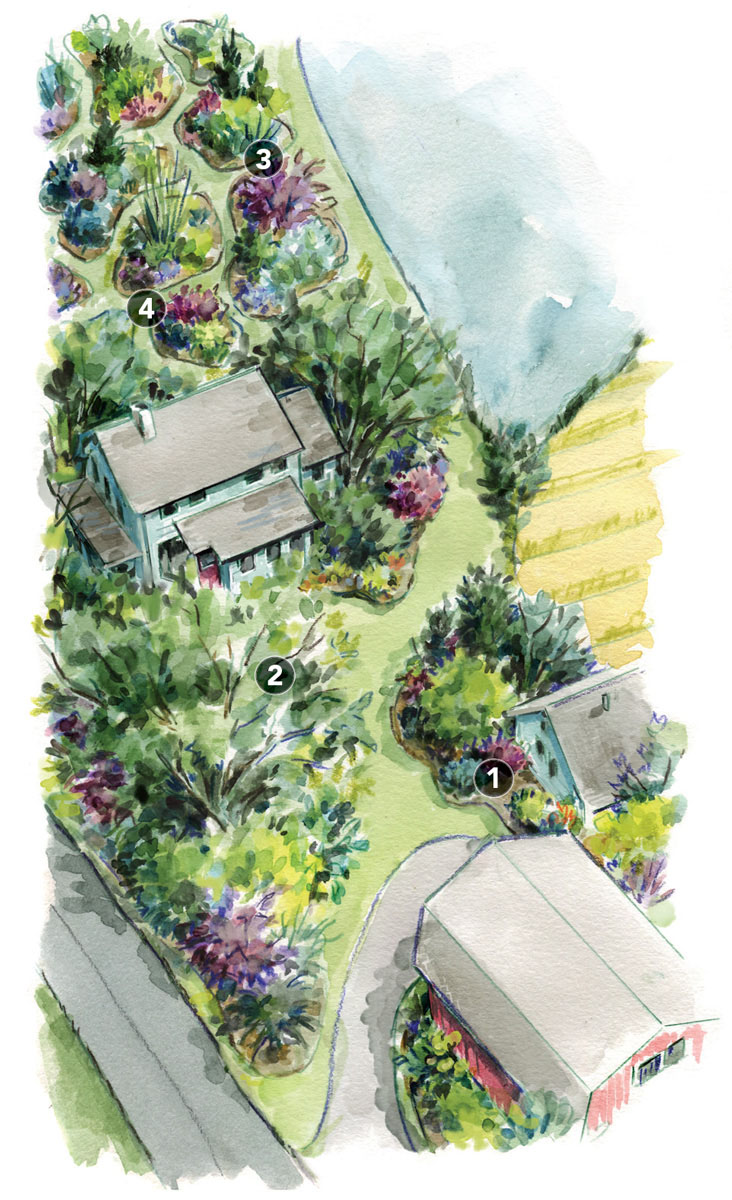
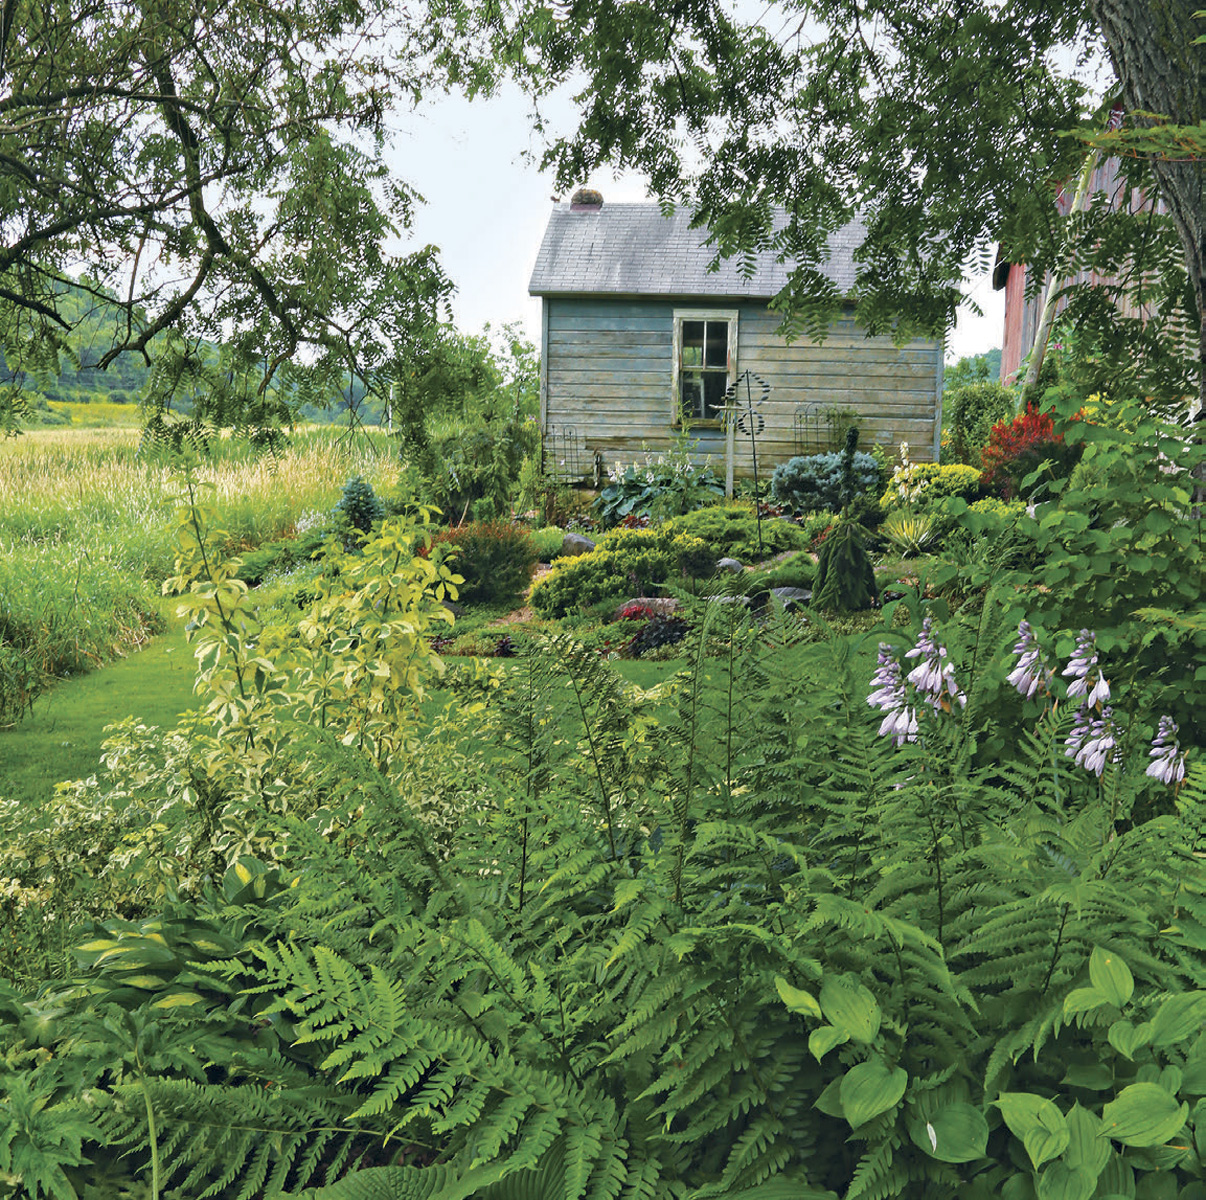
From exposed to enclosed
Once open farmland, this garden was designed to be sheltered from the elements.
- Small shed with conifer garden
- Black walnut trees and shade gardens
- Island garden beds separated by twisting grass pathways
- Original berm garden to hide septic tank
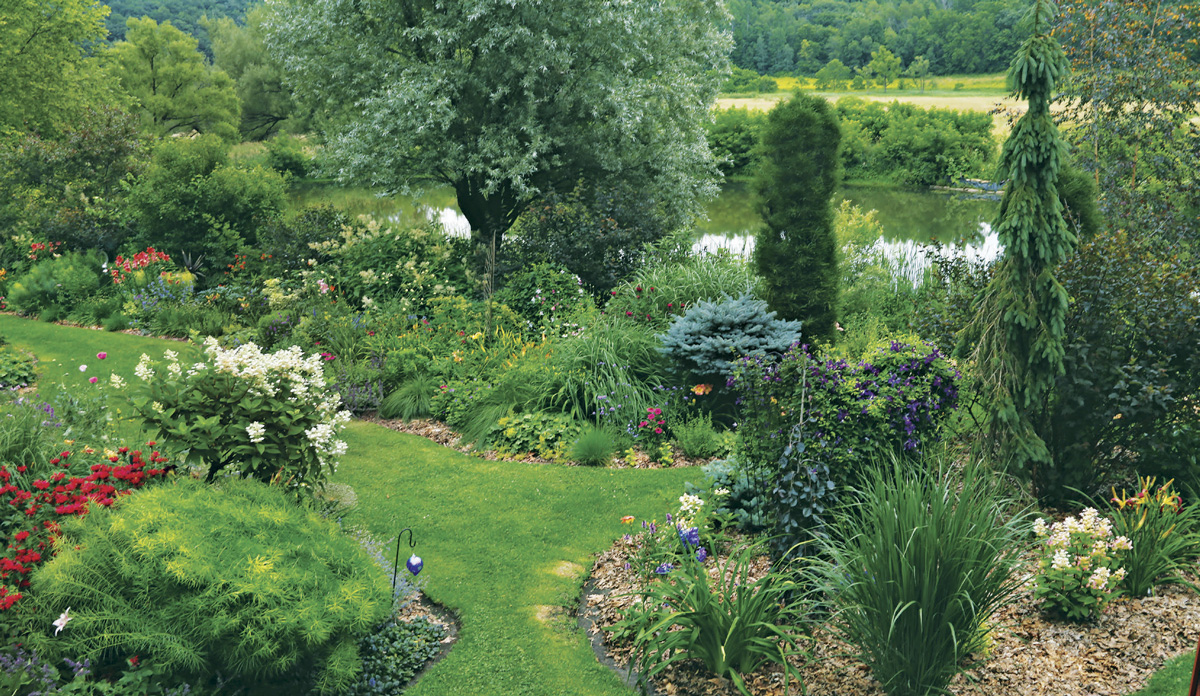
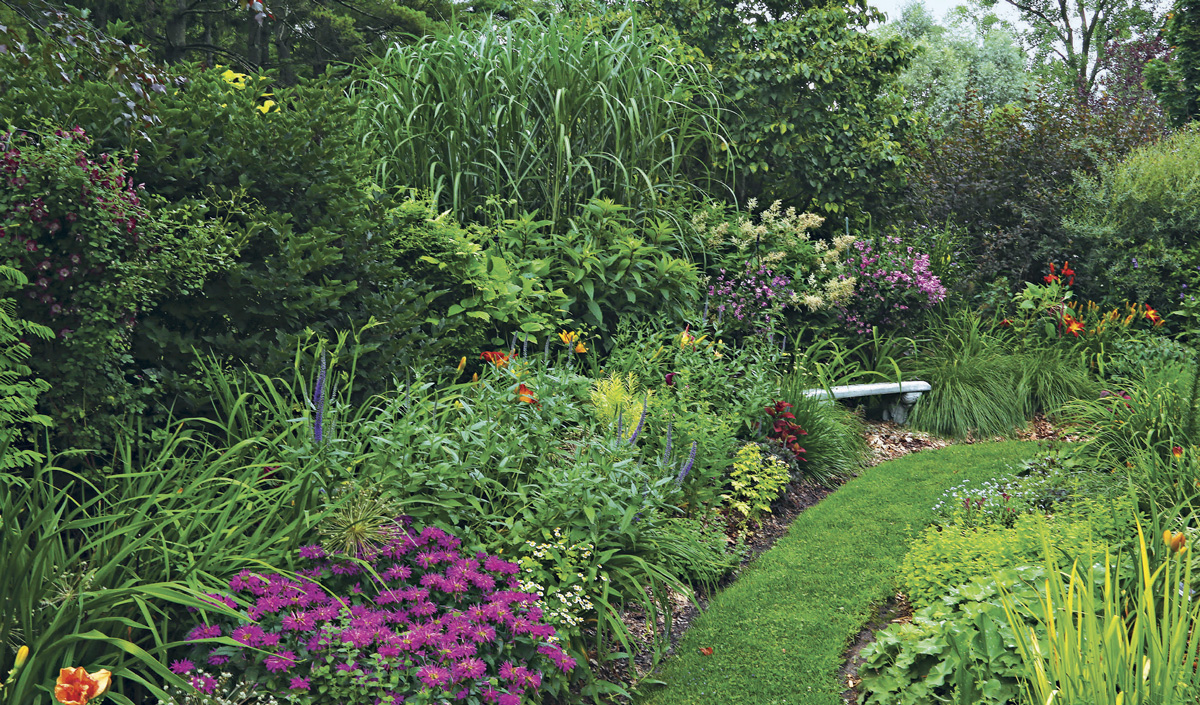
Island beds break up the flat expanse and the wind
My first garden bed was installed in an effort to screen the new septic tank that had just been put in. To get instant screening, I created a slightly elevated berm and then planted several tall, fast-growing plants at the top of the incline. This methodology ended up having an unintended outcome: The height of the planting provided a wall of protection from the wind and harsh elements. It also allowed me to tuck more tender plants that needed protection behind the wind break. Outbuildings and an array of tall perennials and small trees were both used for protection from the elements. Creating this garden bed—which started as a problem solver—turned out to be a life-changing experience, as I discovered my love of plants and realized I’d need to make more beds.
In the process of creating more garden areas, the decision on the shape and location of a new bed was based on a desire to feel the garden wrapping around you like a warm blanket—the exact opposite of what the large, flat, exposed plot of farmland was when I started. There are no huge expanses of lawn; rather, each garden bed is close to the next, like a chain of islands. I did this so that, as you look at one area, you are very aware that another section of garden is close at hand. Through the proximity of the garden beds as well as a repetition of plants, there is a sense of cohesion among all the garden areas, which again adds to the sense of peaceful enclosure.

Having a country setting has worked well with my own informal style. There are few straight lines through out the garden, in keeping with the lack of straight lines in the natural surroundings. To complement this, I chose to use grass or gravel between the beds rather than hardscaping. The paths serve to move you along from one garden to the next and create an element of surprise as they curve and reveal a new view of a hidden space, adding to the drama.
Layering adds interest to the beds and the layout
The garden beds are planted in a full, lush, and overflowing style. However, the informality within the beds is contrasted by very sharp and clear bed edges. I have always liked combining many different types of plants in the same garden bed, using shrubs, perennials, bulbs, reseeding annuals, and tropicals. When you do this, layering comes naturally. Your eye moves from a low-growing plant in bloom like ‘Hummelo’ betony (Stachys officinalis ‘Hummelo’, Zones 4-8) to a garden phlox (Phlox paniculata cv., Zones 4-9) blooming at a height of 3 feet, to a clematis (Clematis spp. and cvs., Zones 4-9) flowering from 2 feet to 6 feet up a trellis. I’ll purposely place a grouping like this next to a large shrub with interesting foliage like Diabolo® ninebark (Physocarpus opulifolius ‘Monlo’, Zones 3-7), which might be 8 feet tall.
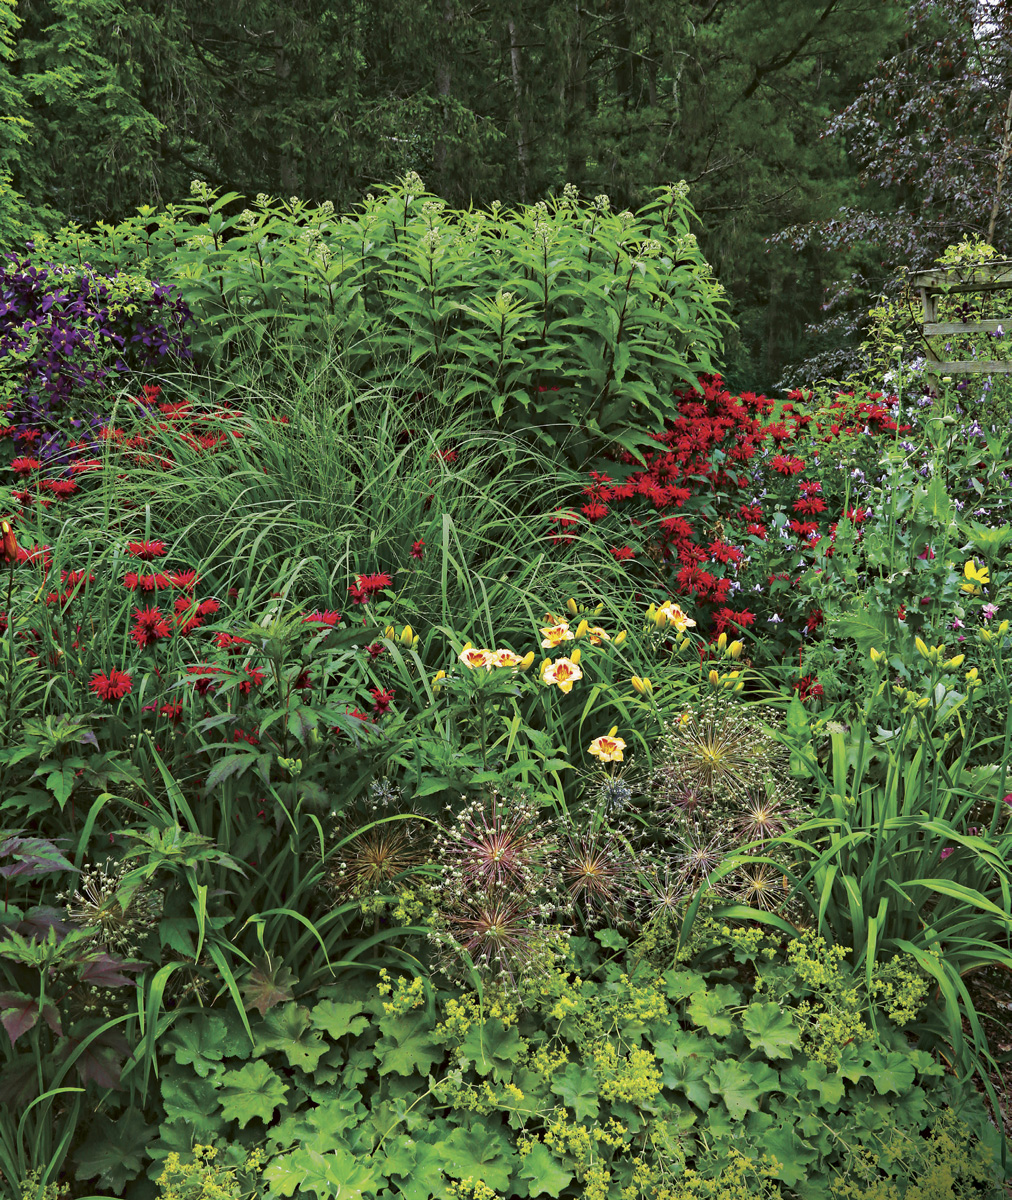
The layering process often starts with a new plant I’ve fallen in love with. This dramatic plant is then placed among others that highlight my “new best friend.” That usually means looking for supporting plants with striking contrasts in foliage color and, especially, texture, because the foliage really forms the ever-present backbone of the garden. I continue filling each bed like this—coming up with interesting groupings of plants—and placing them next to one another—instead of planting singular plants, one at a time. There is always something to attract your eye at each layer, which adds to that sense of being ensconced in the design.
I have a special love for tall perennials that make up the uppermost layer, especially beefy grasses like ‘Malepartus’ miscanthus*, ‘Skyracer’ purple moor grass (Molinia caerulea ssp. arundinacea ‘Skyracer’, Zones 5-8) and ‘Northwind’ switchgrass (Panicum virgatum ‘Northwind’, Zones 4-9). These have the unique ability to seamlessly connect surrounding plants, often allowing close-by groupings with competing colors to somehow blend together. Grasses also serve to protect more tender plants from the wind. In a garden of many island beds, you might expect all of these tall plants to obstruct your view, but they don’t. Standing in one spot, your view of something might be blocked, but move just a few feet, and you can suddenly see. Many of the plants may seem unusually large, but they reflect the large setting and fit its scale, and I found that the surrounding natural landscape becomes another layer in the space.
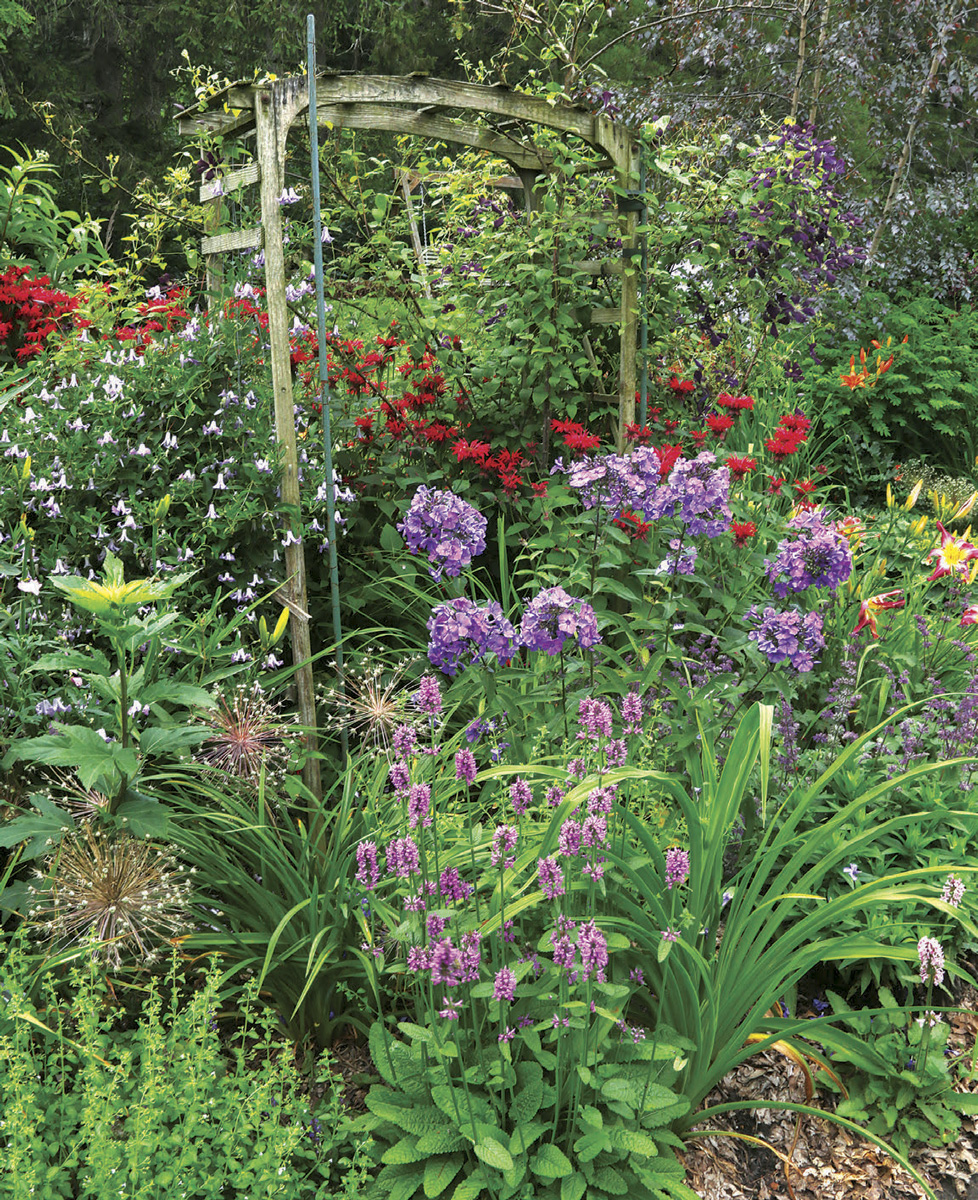
Plant intensively for fullness and extra protection
One look at my garden, and you’ll see that I plant things fairly close together. This is because I prefer a very full, lush look, and it’s also because plants are better protected from the elements and more easily hidden from deer (and other wildlife) when they’re huddled close together. In order to avoid overcrowding as the season progresses, I do some pruning of the perennials. For instance, Japanese primrose (Primula sieboldii, Zones 4-9) puts on an amazing show in spring but tends to spread a lot, which would be problematic to other plants nearby. After it blooms, I usually remove at least half of the plants, knowing that there will still be a good show the following spring with the half that’s left. Early bloomers like meadow rue (Thalictrum aquilegiifolium, Zones 4-8) are cut back after they flower to allow late bloomers like ‘Perfect Storm’ hibiscus to fill the space. These are not low-maintenance techniques, but they do enable a full look without chaos setting in.
I certainly made my share of mistakes in my early gardening years, but trial-and-error is the best teacher. And sometimes, experimentation leads to a happily surprising outcome, like finding out that many native plants (as well as some non-natives) actually do well under black walnut trees. Sometimes, it means that conifers need to have winter protection from deer, while trees close to the pond need to be caged to 3 feet high to protect them from beavers. And sometimes, it means that nature wins. You cannot dissuade a snapping turtle from making her nest wherever she chooses! But in the end, gardeners are optimists, and my love of plants, stubborn persistence, and sense of humor have made it possible for me to garden against the odds.
Plants that fill in but don’t take over
Some of the worst weeds in my gardens are plants I planted myself years ago. I found out fairly early on how important it is to do some research before choosing a plant to add to the garden. If the cultivar name is ‘Running Tapestry’, you might as well just believe that it runs. Here are some of my favorite plants for adding fullness:
|
|
|
1. ‘Claude Shride’ martagon lilyName: Lilium martagon ‘Claude Shride’ Zones: 3-7 Size: 3 to 4 feet tall and 3 feet wide Conditions: Full sun to partial shade; moist, well-drained, fertile soil |
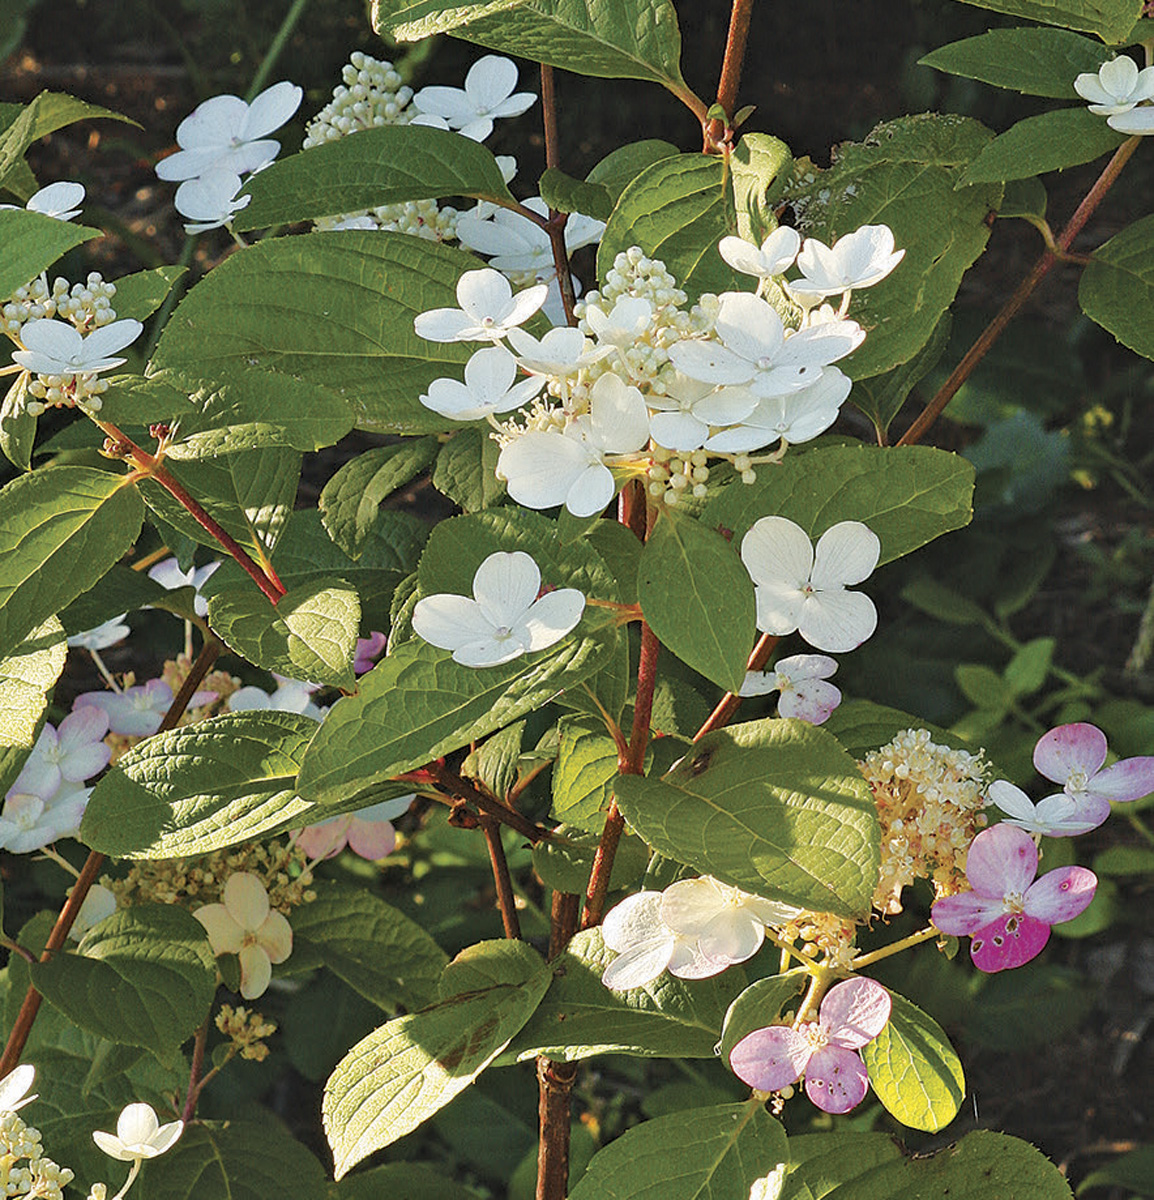
2. Quick Fire® panicle hydrangeaName: Hydrangea paniculata ‘Bulk’ Zones: 3-9 Size: 6 to 8 feet tall and wide Conditions: Full sun; well-drained soil |
|
|
|
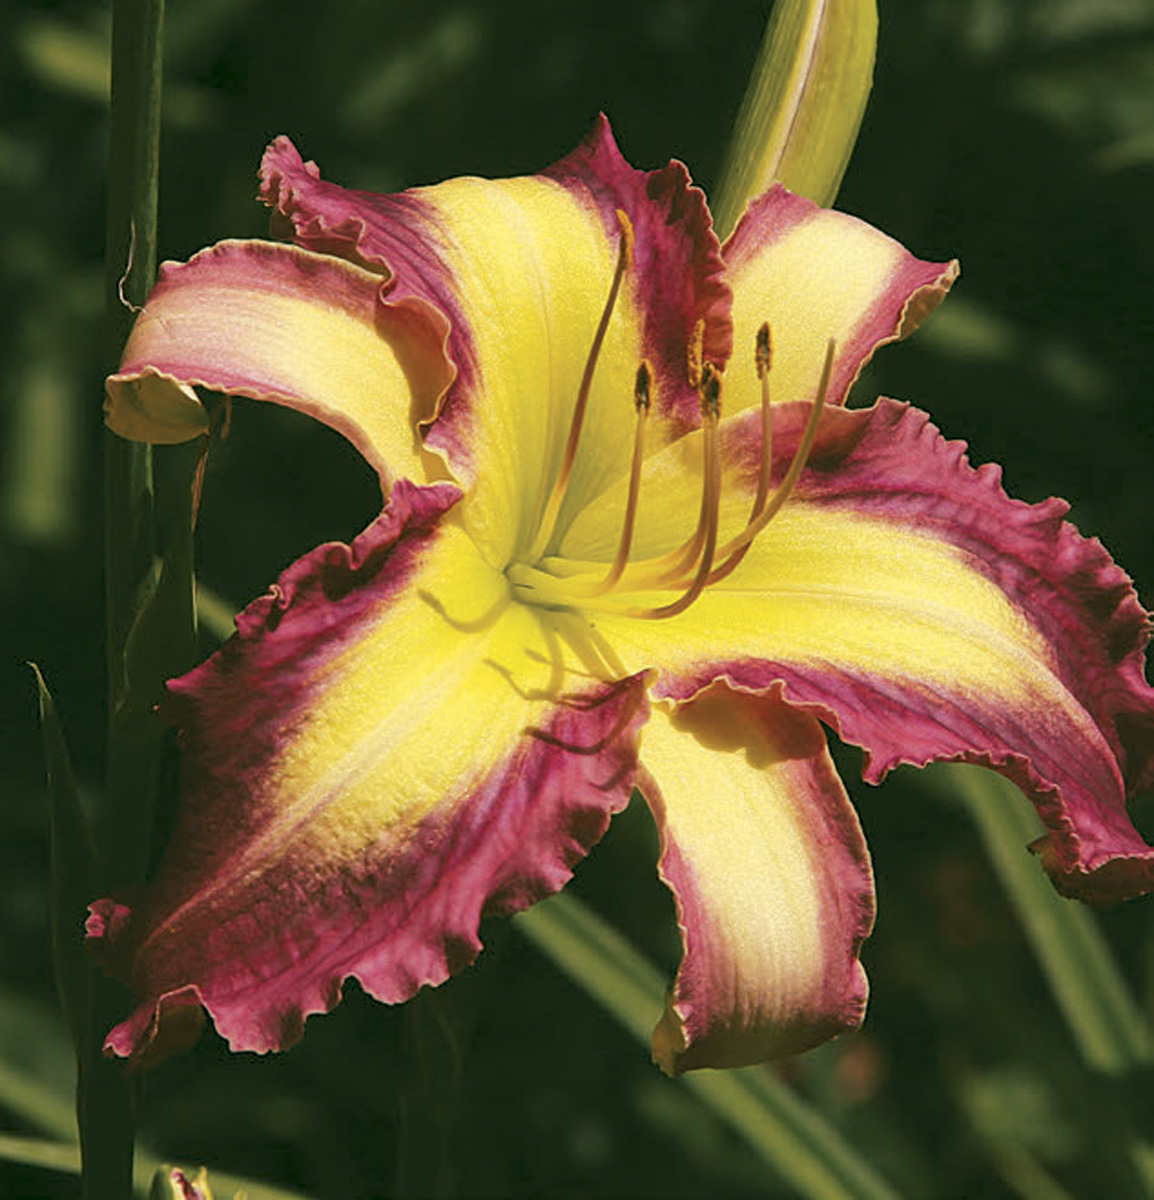
3. ‘Time Stopper’ daylilyName: Hemerocallis ‘Time Stopper’ Zones: 3-9 Size: 3 feet tall and 2 feet wide Conditions: Full sun; well-drained soil |
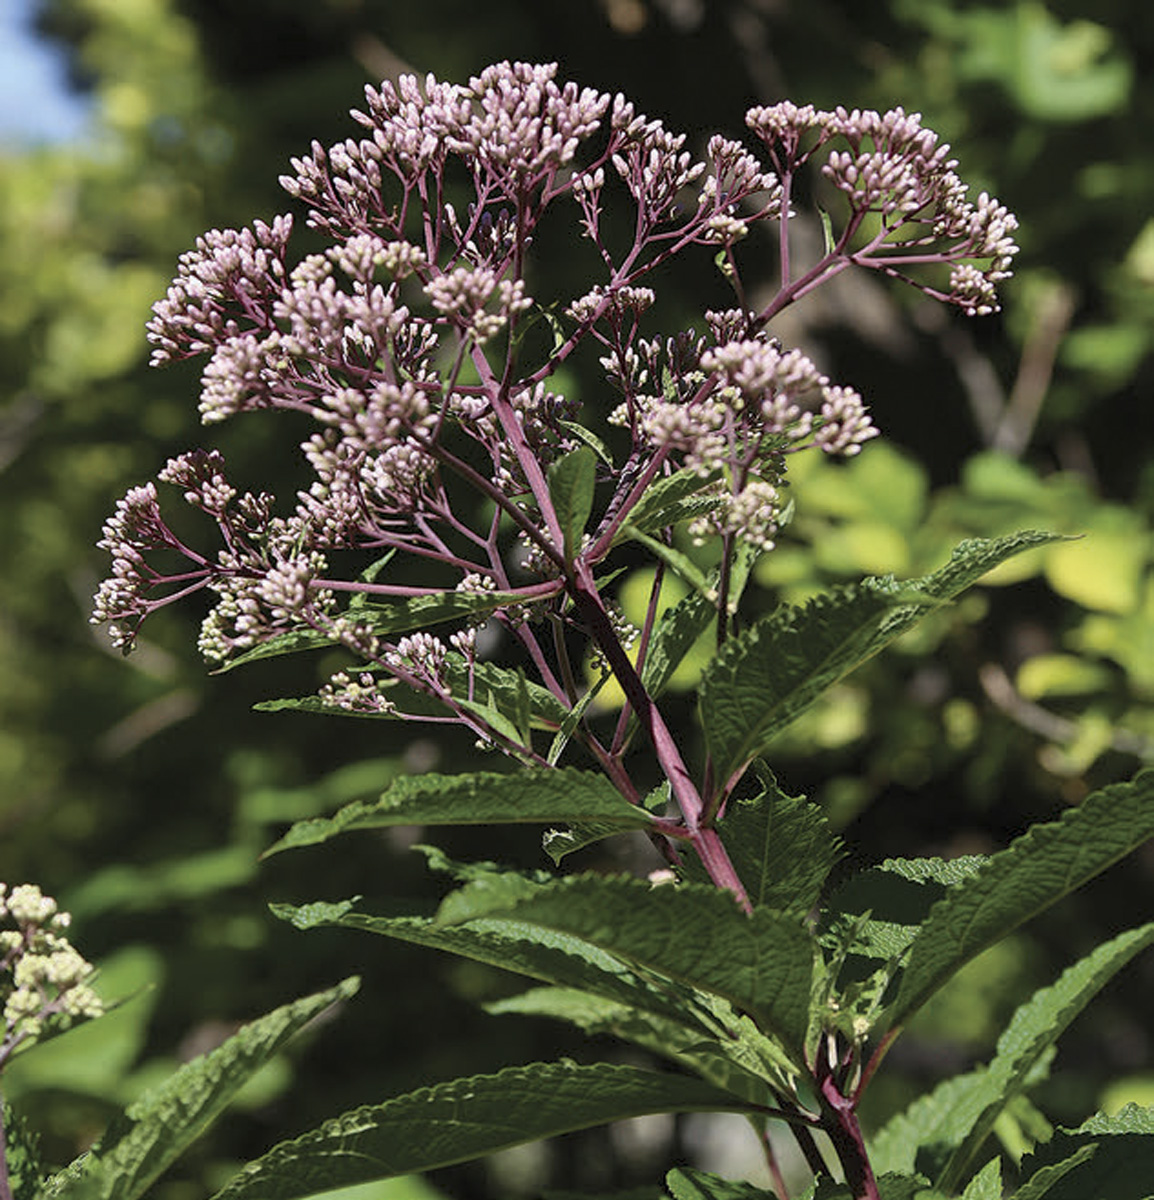
4. ‘Gateway’ Joe-Pye weedName: Eutrochium maculatum ‘Gateway’ Zones: 4-8 Size: 4 to 5 feet tall and 1 to 2 feet wide Conditions: Full sun to partial shade; moist soil |
|
|
|
5. ‘Malepartus’ miscanthusName: Miscanthus sinensis* ‘Malepartus’ Zones: 5-9 Size: 5 feet tall and wide Conditions: Full sun; well-drained soil |
6. ‘Perfect Storm’ hibiscusName: Hibiscus ‘Perfect Storm’ Zones: 4-9 Size: 3 feet tall and 4 to 5 feet wide Conditions: Full sun; well-drained soil |
|
|
|
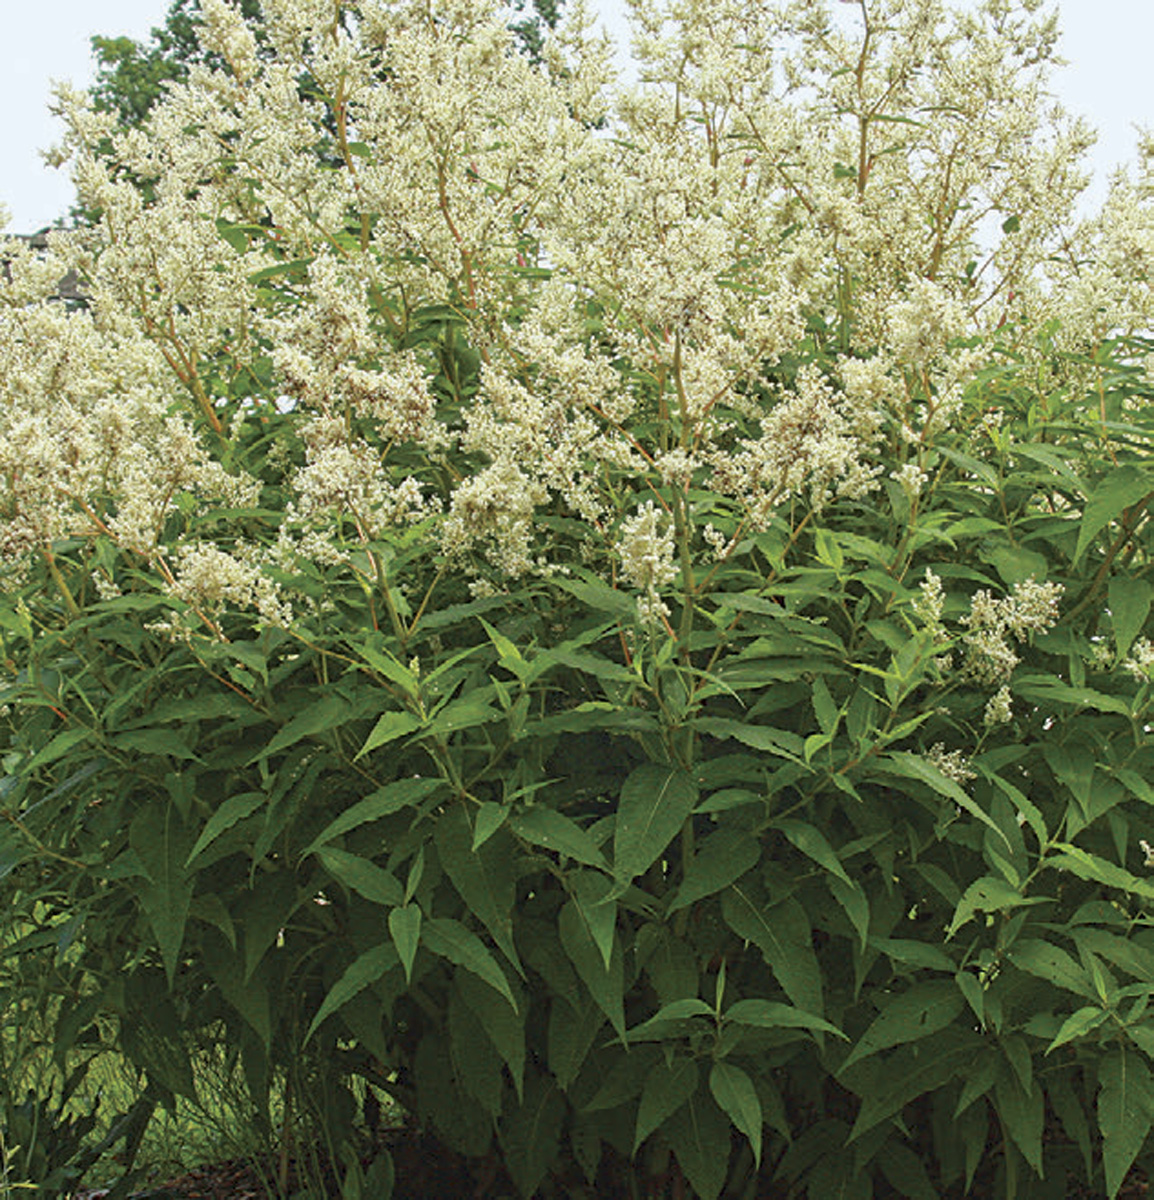
7. KnotweedName: Persicaria polymorpha Zones: 4-9 Size: 3 to 5 feet tall and wide Conditions: Full sun; moist, well-drained soil |
8. ‘Polish Spirit’ clematisName: Clematis viticella ‘Polish Spirit’ Zones: 5-9 Size: 12 feet tall and 6 feet wide Conditions: Full sun to partial shade; moist, well-drained soil |


*Invasive alert: Miscanthus (Miscanthus sinensis)
This plant is considered invasive in CT, GA, IL, IN, KY, MD, NC, NH, NJ, NY, PA, SC, TN, VA, and WI.
Please visit invasiveplantatlas.org for more information.
Jeannette Golden battles nearly every garden obstacle imaginable in her Black Earth, Wisconsin, landscape.
Photos, except where noted: Danielle Sherry

